
A successful season starts long before the first game. It begins with a solid plan. For those leading community programs, smart planning is key.
You need to balance school schedules, facility use, and other league events. The aim is to create a schedule that avoids burnout and peaks at the right time. This is critical for youth athlete development, where challenges must match their age.
A good plan organizes everything. It sets clear goals for all, from young kids to adult players. This structure turns confusion into confidence. It ensures a season where everyone grows, stays involved, and enjoys the game.
Baseline Fitness and Skill Assessments You Can Do on a Field
The best training tips from local coaches start with simple field tests. These tests help you understand where your team is at the beginning. Knowing this lets you plan how to improve.
These tests need little equipment—just a stopwatch, tape, cones, and your eyes. They give you data to track progress. This is great for volunteer coaches who want to see real results.
Begin with basic fitness tests. These measure how athletic someone is, which is important for most sports.
- Timed Sprint: Mark out 40 yards. Time each athlete from a standing start. This tests explosive speed and acceleration, key for soccer, flag football, and softball.
- Beep Test or 12-Minute Run: For endurance. Use a free app for the beep test or measure how far an athlete can run in 12 minutes. It shows cardiovascular fitness for ultimate frisbee or basketball.
- Standing Broad Jump: Measure the distance jumped from a two-footed takeoff. This assesses lower-body power and coordination, important for volleyball and jumpers.
- Push-Up Test (to fatigue): Count how many proper-form push-ups an athlete can do without stopping. It shows upper-body strength and endurance.
Then, do skill assessments. Choose drills that match your sport’s core actions. This lets you see how athletes handle the basics.
For throwing sports (baseball, softball, football), have athletes throw at a stationary target from 30 feet. Rate their accuracy and form, not just distance.
For soccer or hockey, set up a dribbling course with cones. Time athletes as they navigate while keeping control of the ball. Note their favored foot and turn tightness.
For basketball, a spot-shooting drill from five locations around the hoop is helpful. Count successful shots out of ten attempts from each spot.
Remember, these assessments are not to rank or embarrass. They help establish a fair starting point. Share the results and explain their importance. Seeing improvement later in the season motivates everyone.
By spending one practice on these evaluations, you improve your coaching. You’ll know exactly where to focus, making drills and training tips more effective.
Building a Balanced Weekly Training Plan (Practice + Strength + Recovery)
A balanced training week is like a roadmap for community athletes. It helps them move from basic fitness to top performance. This plan mixes practice, strength training, and rest.
Think of your plan as having three main parts. The first is skill and tactical practice. The second is foundational strength and conditioning. The third, and just as important, is structured recovery. Without any of these, progress can stall or injuries can happen.
For community leagues, changing the week’s focus and intensity is key. A tough day of drills should be followed by a lighter day or different work. This method, called daily undulating periodization, keeps athletes sharp and adaptable.
Here’s a weekly template for a team with two weekly meetups. It balances practice drills with other training.
| Day | Primary Focus | Session Type | Duration (Minutes) | Key Objective |
|---|---|---|---|---|
| Monday | Active Recovery / Mobility | Light cross-training, stretching, foam rolling | 30-45 | Promote circulation, reduce soreness |
| Tuesday | Sport-Specific Practice | Team practice: skill development and game scenarios | 90-120 | Execute and refine practice drills, build team cohesion |
| Wednesday | Strength & Conditioning | Full-body strength session (bodyweight or light weights) | 45-60 | Build muscular resilience, prevent injuries |
| Thursday | Recovery / Light Skill Work | Individual or small group technical review, walking, yoga | 30-60 | Reinforce learning without physical strain |
| Friday | Speed & Agility | Dynamic footwork drills, short sprints, ladder work | 40-50 | Enhance quickness and change of direction |
| Saturday | Team Practice / Scrimmage | High-intensity practice, conditioned games | 90-120 | Apply skills under pressure, simulate competition |
| Sunday | Complete Rest | No structured physical activity | – | Physical and mental restoration |
Adjust your plan based on the season. Early season might focus more on drills, strength, and recovery. As competition approaches, shift to more tactical practice and strength maintenance.
Key principles for your plan:
- Contrast Hard and Easy Days: Never schedule two high-intensity days back-to-back.
- Strength Follows Practice: Schedule strength sessions after practice days, not before. Fatigue from lifting can ruin technique work.
- Recovery is Active: Light movement on recovery days beats complete inactivity. A walk or gentle yoga speeds healing.
- Listen to Your Team: If athletes look consistently drained, add a recovery day or reduce volume.
For youth athletes, focus on skill development and fun. Keep strength sessions bodyweight-based. Adult recreational athletes may need more focus on injury prevention and recovery.
The ultimate goal is consistent, injury-free improvement. A balanced plan prevents burnout by respecting the body’s need for stress and rest. It turns effort into lasting results.
Start with the template, then adjust based on your team’s feedback and progress. The best plan is the one your athletes can stick to and enjoy while refining their practice drills.
Dynamic Warm-Up and Mobility Routines That Prevent Injuries
The first ten minutes of practice are critical for safety and performance. A dynamic warm-up is essential for any sports team. It involves moving continuously to warm up the muscles and prepare for sports.
A good dynamic warm-up has three parts: raise the pulse, improve mobility, and activate sport-specific movements. This structure helps prevent injuries by preparing the body.
Begin with a five-minute Pulse Raiser. This is light exercise to get the heart rate up. Athletes can jog, do side shuffles, or carioca drills. Aim for a light sweat, not exhaustion.
Then, focus on Dynamic Mobility for five to eight minutes. This phase builds flexibility through motion. Include exercises like walking knee hugs and lunges with twists. Each movement should be controlled to cover the full range of motion.
The last phase is Sport-Specific Activation. Spend two to three minutes on movements that mimic the upcoming practice. For field sports, try high knees and skipping. This phase gets the body ready for explosive actions.
Here’s a simple 8-minute routine for any practice:
- Minute 1-3 (Pulse Raiser): Light jogging, changing direction every 30 seconds.
- Minute 4-6 (Dynamic Mobility): 10 reps per side of leg swings, walking lunges, and torso twists.
- Minute 7-8 (Activation): 20-yard sprints at 75% effort, focusing on quick foot turnover.
Consistency is key. By making these dynamic warm-up routines a staple, you build a culture of injury prevention. Your athletes will perform better and recover faster.
Foundational Strength Training for Youth and Adult Rec Athletes
Building a strong foundation is key for all athletes, not just the elite ones. It’s vital for anyone wanting to do better in sports. For community sports, a good strength and conditioning plan helps build strength and resilience.
Many think strength training means heavy weights and fancy machines. But that’s not true. The real foundation starts with mastering your own body weight. It teaches you control, stability, and how to move right.
Safety is the most important thing, even more for young athletes. We aim to support their growing bodies, not overwork them. Exercises should get progressively harder and always focus on how you do it, not how much you lift.
Every athletic move comes down to a few basic patterns. Learning these patterns makes you a complete athlete:
- Squats: They’re key for jumping, landing, and changing direction. Keep your chest up and knees over toes.
- Lunges: They help with single-leg stability and hip movement. Step forward or backward with control.
- Pushes: Think push-ups or band presses. These strengthen your upper body for throwing and blocking.
- Pulls: Rows or band pull-aparts. They balance out pushing muscles and protect your shoulders.
You don’t need a fancy gym to start. Bodyweight exercises are perfect for beginners. Adding resistance bands can add variety. They’re portable, safe, and great for learning tension.
This training helps you perform better on the field. Stronger muscles protect your joints. Better stability means fewer twisted ankles. And explosive power comes from a solid foundation. Studies on strength training for young athletes show it’s good for their long-term health.
Begin with two short workouts a week. Focus on doing them right. Being consistent with these basics will make your season better and safer.
Speed, Agility, and Footwork Drills with Minimal Equipment
Coaches can boost their team’s movement with just cones and open space. It’s key to improve speed, agility, and footwork for any sport. You don’t need fancy gear or a weight room.
Focus on the quality of each movement, not just how many. Proper form prevents injuries and builds better habits. The right coaching cue can make a drill click for an athlete instantly.
These exercises help athletes get faster and chase down balls better. Set up two cones 20-40 yards apart.
- Flying 10s: Jog for 10 yards, then sprint at maximum effort for the next 10 yards. Focus on driving your knees and pumping your arms. The key cue is, “Push the ground away behind you.”
- Acceleration Sprints: Start from a two-point stance and explode for 20 yards, gradually building to full speed. Coach athletes to “lean forward like you’re climbing a hill” for the first five steps.
Multi-Directional Agility for Game-Like Movement
Sports are played in all directions. These drills train the body to stop, start, and change direction efficiently.
- 5-10-5 Shuttle (Pro Agility): Place three cones in a line, five yards apart. Sprint five yards to one side, touch the ground, sprint ten yards across to the far cone, touch, and sprint back five yards to the start. The vital cue is, “Stay low and push off your outside foot when you change direction.”
- T-Drill: Set cones in a “T” shape. Sprint forward 10 yards, shuffle 5 yards left, shuffle 10 yards right, shuffle 5 yards back left, then backpedal to the start. Remind athletes to “keep your hips and shoulders square to the direction you’re moving.”
Quick Footwork for Balance and Control
Fast feet improve balance, reaction time, and the ability to make micro-adjustments during play.
- In-Out Ladder Drill: Using a ladder or spaces on the ground, step one foot in a square, then the other foot in, then the first foot out to the side, followed by the second foot out. The rhythm cue is, “In, in, out, out—stay on the balls of your feet.”
- Cone Taps (Speed Taps): Place a cone in front of you. Rapidly tap the top of the cone with alternating feet as fast as possible for 10-15 seconds. The focus is on “light, quick touches, like you’re dancing on hot coals.”
Incorporate these speed and agility drills into your practice warm-ups or skill blocks. Consistent work on these fundamentals builds faster, more responsive, and confident athletes. They learn to control their bodies in space, which translates directly to better performance on game day.
Sport-Specific Skill Blocks and Progressions
Good coaching breaks down athletic skills into smaller steps. This method, called skill progression, makes complex skills easier to learn. It helps athletes get better and feel more confident step by step.
The best way to teach is the whole-part-whole method. First, show the whole skill at game speed. Then, focus on its key parts. Lastly, put it all together again in a controlled setting.
This method works for any sport. Let’s see how it applies to soccer dribbling, basketball shooting, and baseball hitting.
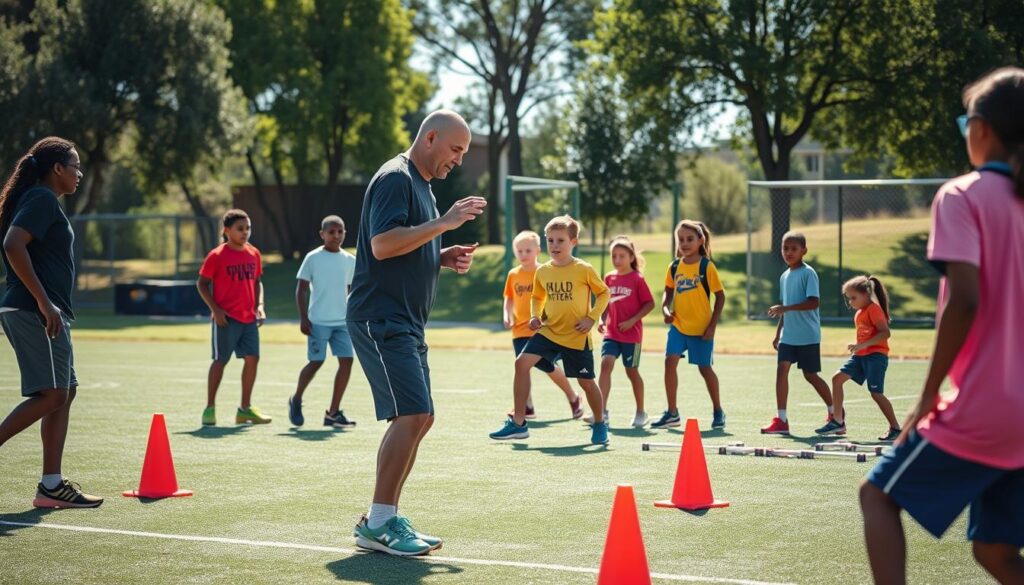
For soccer dribbling, start with the whole. Show a player weaving through cones at pace. Then, break it into parts. Block one is close ball control using the inside and outside of both feet. Block two adds changes of direction and speed. Block three incorporates feints and shielding against a passive defender.
Basketball shooting follows a similar path. The whole is a game-speed jump shot. The parts begin with proper hand placement and balanced stance. Next, players focus on the shooting motion without the jump. Then, they add the jump and practice under defensive pressure.
In baseball, hitting a pitched ball is a challenging skill progression. The whole is a full swing at a live pitch. Coaches then break it down. Part one is the stance and load. Part two is the stride and hip rotation. Part three is bat path and contact point. Drills isolate each block before combining them.
The table below outlines sample progressions for these sports. It provides a clear roadmap from simple foundation to complex game application.
| Sport | Target Skill | Block 1: Foundation | Block 2: Development | Block 3: Game Application |
|---|---|---|---|---|
| Soccer | Dribbling for Possession | Inside/Outside Foot Taps in a Square | Cone Weaves with Speed Changes | 1v1 Keep-Away in a Grid |
| Basketball | Jump Shot Accuracy | Form Shooting (One Hand) Close to Rim | Shot Motion with Jump, No Defense | Catch-and-Shoot Drills with a Closing Defender |
| Baseball/Softball | Consistent Hitting | Tee Work for Stance and Swing Path | Soft Toss for Timing | Live Pitching with a Focus on Pitch Selection |
Each block must be mastered before advancing. Rushing the skill progression leads to frustration and bad habits. Coaches should look for consistency and control at each level.
Confidence grows with each small victory. An athlete who successfully completes a foundational drill is ready for the next challenge. This structured approach ensures no step is missed.
When designing your own progressions, always start simple. Identify the non-negotiable fundamentals of the skill. Create drills that repeat those fundamentals in isolation. Then, gradually add game-like variables like movement, decision-making, and opponents.
Remember, a good skill progression is a ladder. Every athlete climbs at their own pace. Your job is to ensure each rung is solid before they reach for the next one.
Cross-Training Options Using Parks, Trails, and School Facilities
Don’t just stick to the practice field. Your neighborhood recreation center and public trails offer great opportunities for cross-training. This approach makes your body stronger, reduces injury risks, and keeps workouts interesting. Plus, you can do it all for free by using what’s already around you.
Local parks are more than just places for picnics. A grassy hill is perfect for sprint intervals that boost power and endurance. Park benches can be used for step-ups, tricep dips, and incline push-ups. Open fields are great for bodyweight circuits, agility ladder drills, and plyometric exercises.
Trail running or hiking is a top choice for endurance training. The uneven terrain strengthens muscles in your ankles, knees, and hips. This improves your balance and reduces injury risks. Plus, the changing scenery keeps your mind engaged and fresh.
School facilities are a treasure trove after hours or on weekends. Stadium bleachers are great for conditioning workouts. Running the stairs improves leg strength and lung capacity. The school track is ideal for interval training, while the open field is perfect for sport-specific drills. Many areas also offer access to a community recreation center with extra amenities.
To help you plan, the table below compares key local venues for effective cross-training. It highlights the unique benefits of each space.
| Location | Sample Activity | Primary Fitness Benefit | Equipment Needed |
|---|---|---|---|
| Public Park | Hill Sprints & Bench Circuits | Builds power, speed, and muscular endurance | None (bodyweight) |
| Local Trail Network | 30-Minute Trail Run/Hike | Boosts cardiovascular endurance and joint stability | Proper footwear |
| School Grounds | Bleacher Runs & Field Sprints | Enhances conditioning and sport-specific agility | None |
| Community Recreation Center | Swim Laps or Court Sports | Provides low-impact cardio and full-body engagement | Varies (often provided) |
Adding one or two of these sessions to your weekly plan can make a big difference. It breaks the monotony of sport-specific practice. You’ll develop a broader athletic base that benefits your main sport.
Always check local rules for using public spaces. Prioritize safety, even more so on trails or when training alone. Your local community recreation center can often provide schedules for open swim or gym time. It’s a reliable spot for varied training.
Coaching Cues and Positive Feedback That Stick
The words a coach uses can either boost an athlete’s confidence or confuse them. Beyond drills and fitness, good communication is key. It’s a core part of effective local sports training tips. This section explains how to give instructions and feedback that athletes can understand and use to get better.
Great coaching cues are clear, simple, and easy to follow. Instead of saying “get low,” say “bend your knees until they’re parallel to the ground.” Replace “move faster” with “explode out of the start on the count of three.” Specific language helps athletes know exactly what to do. It makes learning faster.
It’s important to balance praise and correction. A good rule is to give four compliments for every piece of advice. This doesn’t mean praising poor effort. It means looking for and praising what’s done well. This keeps athletes motivated and open to making changes.
Generic praise like “good job” is easy to forget. Specific praise is more powerful. For example, “Nice hustle” is better than “I saw how you recovered quickly after that missed pass—that’s great mental toughness.” The second version tells the athlete what to repeat. It turns feedback into a valuable learning tool.
Creating a positive environment means adjusting your communication for different skill levels. Beginners need simple, success-focused cues. Focus on one key correction at a time. For advanced athletes, use more tactical language. Challenge them with “what if” scenarios. For all levels, frame corrections positively. Say “try keeping your elbow in” instead of “don’t let your elbow flare out.”
Your communication style sets the tone for every practice. The right words can make a routine session into a powerful learning experience. Mastering this skill is essential for advanced local sports training tips.
| Communication Aspect | Effective Coaching Language | Ineffective Coaching Language | Why It Works |
|---|---|---|---|
| Giving Instructions | “Sprint to the cone, touch it with your left hand, and shuffle back.” | “Go over there and come back.” | Provides a clear, sequential action plan. Eliminates ambiguity. |
| Offering Praise | “Your footwork on that cut was precise because you kept your hips low.” | “Good move.” | Identifies the specific skill executed well. Reinforces correct technique. |
| Correcting Form | “Let’s work on driving your knee upward for more power.” | “Your kick is weak.” | Focuses on a solvable action. It is constructive, not critical. |
| Motivating During Effort | “Last two reps! Push with your legs, you’ve got this!” | “Hurry up and finish.” | Combines encouragement with a technical reminder. Fosters a team atmosphere. |
| Addressing Mistakes | “The pass was late. Next time, lead your teammate ahead of their stride.” | “You threw it away.” | States the fact without blame. Immediately provides a solution for next time. |
Review the table above before your next practice. Choose one or two communication shifts to implement. Notice how athletes respond with better focus and improved effort. Consistent, positive communication is the glue that binds all other local sports training tips together. It turns a group of individuals into a cohesive, improving team.
Sample 4-Week Practice Plan Templates
These 4-week plans are a practical guide for coaches. They show how to schedule weekly progressions. A template turns theory into action, saving hours of planning. The plug-and-play resources fit different season phases. You can adjust them for your team’s sport, age, and schedule.
Pre-Season Foundation Builder Template
This phase focuses on building fitness and re-introducing skills. It prepares athletes’ bodies for the season. The goal is to gradually increase volume while keeping intensity moderate.
Weekly Focus:
- Week 1: Re-acclimation. Low-intensity skill drills, introductory strength circuits, and extended dynamic warm-ups.
- Week 2: Base building. Increased conditioning, introduction of agility ladders, and more complex skill combinations.
- Week 3: Integration. Sport-specific scenarios at half-speed, higher-volume strength work, and focused recovery.
- Week 4: Intensity ramp-up. Introduce controlled scrimmages, speed work, and test baseline fitness metrics.
Here’s a Week 2 practice example, integrating local sports training tips for a solid foundation:
| Segment | Duration | Activity | Purpose |
|---|---|---|---|
| Dynamic Warm-Up | 15 min | Jogging, leg swings, inchworms, lateral shuffles | Increase heart rate, improve mobility |
| Skill Block | 20 min | Station-based fundamental drills (e.g., passing, catching, dribbling) | Reinforce technique, build muscle memory |
| Conditioning | 15 min | Interval runs (e.g., 30 sec sprint, 90 sec walk) or shuttle runs | Develop aerobic and anaerobic base |
| Strength Circuit | 15 min | Bodyweight exercises: squats, push-ups, planks, lunges (3 rounds) | Build foundational strength and stability |
| Cool-Down | 10 min | Static stretching for major muscle groups, hydration talk | Promote recovery, instill healthy habits |
In the competitive season, the focus shifts to maintaining fitness and sharpening skills. Practices are shorter but more intense, with a direct link to upcoming games.
Weekly Focus:
- Week 1 (Post-Game): Active recovery, film review, and light technical work.
- Week 2 (Mid-Week): High-intensity tactical drills, situational scrimmages, and speed/agility work.
- Week 3 (Pre-Game): Taper intensity, focus on strategy walkthroughs, and crisp execution drills.
- Week 4 (Game Week): Final tactical prep, very light conditioning, and mental readiness.
A sample mid-week (Week 2) practice during the season is highly focused:
| Segment | Duration | Activity | Purpose |
|---|---|---|---|
| Dynamic Warm-Up | 10 min | Sport-specific movements at increasing pace | Activate nervous system, prevent injury |
| Tactical Skill Block | 25 min | Drills based on last game’s weaknesses (e.g., defensive positioning, set plays) | Improve game IQ, correct errors |
| High-Intensity Conditioning | 10 min | Small-sided games (3v3) or sport-specific conditioning circuits | Maintain game fitness under fatigue |
| Cool-Down & Recovery | 15 min | Foam rolling, partner stretching, hydration/nutrition reminder | Maximize recovery for next game |
These templates are your starting point. The best local sports training tips emphasize adaptability. Swap drills to match your sport, adjust times based on your session length, and always listen to your athletes’ feedback. A great plan is a living document that helps you build a winning season, one well-structured week at a time.
Safety, Equipment, and Heat/Cold Policies for Outdoor Leagues
A league’s duty of care means having clear policies for equipment, heat, and cold. These are key to keeping athletes, volunteers, and the league safe. It’s a must for community sports.
Having written policies helps everyone know what to do. This is a key part of local sports training tips for lasting programs.
Essential Equipment Checks and Safety Gear
Do a full equipment check before the first practice. Choose a coach or volunteer to check if all gear is safe. This step helps avoid many injuries.
Here’s what to check:
- Protective Gear: Make sure helmets, mouthguards, shin guards, and padding fit right and are in good shape.
- Footwear: Cleats or athletic shoes should grip well and support the feet, with no worn-out soles.
- Field and Facility: Check the playing area for debris, holes, and make sure goals, nets, and benches are secure.
- First-Aid Kit: Keep a full first-aid kit ready at every session. It should have ice packs, bandages, antiseptic wipes, and emergency contact forms.
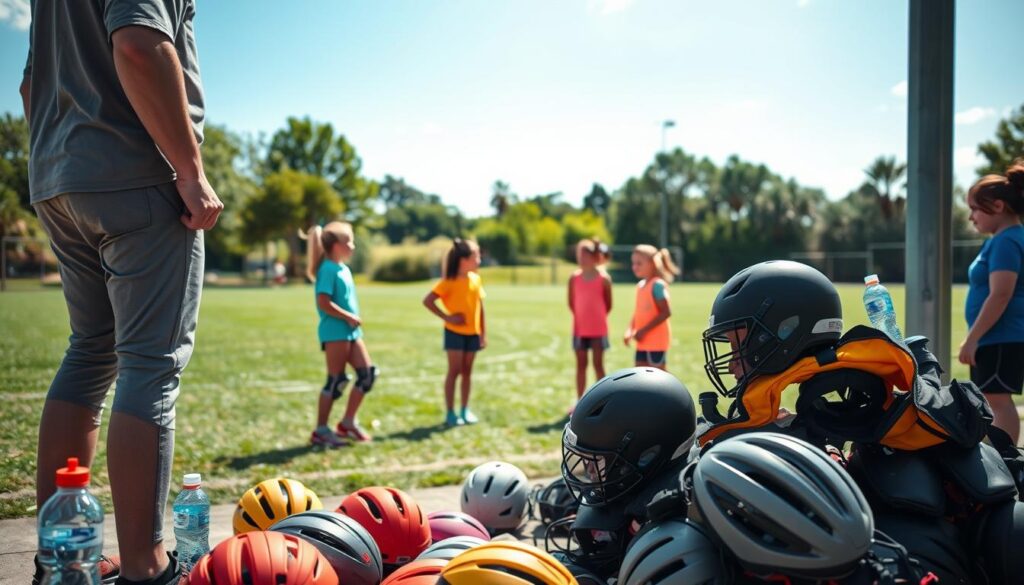
Playing in hot and humid weather is risky. Create a heat policy based on the Wet Bulb Globe Temperature (WBGT) or local heat index. Stop or change practice when it’s too hot.
Make sure athletes drink water every 15-20 minutes. They should bring their own water bottles. Have extra water on hand. Teach coaches to spot early signs of heat illness.
Watch for these signs:
- Excessive sweating followed by cool, clammy skin (heat exhaustion).
- Confusion, dizziness, or headache.
- Nausea or vomiting.
- Absence of sweating with red, hot, dry skin (heat stroke – a medical emergency).
Using these hydration tips is a key local sports training tip for summer leagues. It helps athletes stay safe while playing.
Cold Weather Policy and Hypothermia Awareness
Cold weather and wind chill need special care. Set a cold-weather limit, usually below a certain temperature or wind chill. Wearing layers helps keep warm.
Make sure athletes wear dry clothes. They should change out of wet clothes right after playing. Provide a warm place for breaks. Look out for signs of hypothermia and frostbite.
Watch for these signs:
- Uncontrollable shivering.
- Slurred speech, drowsiness, or confusion.
- Loss of coordination.
- Numbness or white/grayish-yellow skin on extremities (frostbite).
Following these safety, equipment, and weather policies shows true leadership. It makes a place where athletes can grow and have fun. Following these rules makes your program better and more responsible. It turns basic local sports training tips into a culture of care and excellence.
Tracking Progress: Simple Testing Days and Scorecards
Setting up regular check-ins can make a seasonal plan very effective. Seeing progress motivates athletes and proves that local sports training tips are effective.
Plan a “Testing Day” every four to six weeks. Make it a special event, not just another practice. This breaks the routine and builds excitement. Keep the atmosphere positive and encouraging.
On Testing Day, you’ll compare the same baseline assessments from the start of the season. Did the 40-yard dash time get faster? Did the vertical jump height go up? Can players do the agility ladder drill quicker and with fewer mistakes? This direct comparison shows clear growth.
To track progress well, you need a system you’ll actually use. Here are three easy methods for community coaches.
| Tracking Method | Best For | Key Advantage |
|---|---|---|
| Paper Scorecard | Smaller teams, coaches who prefer a tactile system. | Extremely simple to use during testing; athletes can hold their own card and see their results instantly. |
| Digital Spreadsheet (e.g., Google Sheets) | Coaches comfortable with tech, teams sharing data with parents. | Automatically calculates averages and growth percentages; easy to share via link for transparency. |
| Team Management App | Programs already using an app for schedules and communication. | Centralizes all team info; often includes built-in progress charts that visually display improvement over time. |
Use the data to celebrate progress. Highlight the player who improved the most in agility, not just the fastest. Share team-wide average improvements. This focuses on effort, not just talent, which motivates recreational athletes.
This process also shows your program’s value to parents. A simple progress report builds trust. It shows you’re paying attention and that their investment is worth it.
Tracking progress turns guesswork into guidance. It gives you the evidence to refine your approach and celebrate every athlete’s journey. This solidifies your role as an effective leader in community sports.
Involving Parents and Volunteers for Better Sessions
Turning willing parents into a strong support team is key for any community coach. Local leagues often rely on volunteers, but without clear direction, this can cause confusion. The right strategy can turn helpers into powerful assets, making practices smoother and more productive for all athletes.
Start with clear communication. Before the season begins, hold a meeting or send a detailed email explaining how parents can help. Emphasize that their involvement will greatly benefit their child’s experience. This sets a collaborative tone right from the start.
Effective delegation means defining clear, manageable roles. Assign tasks based on a volunteer’s comfort and skill level. General offers to “help” often result in spectators. Instead, offer specific roles. Some of the best volunteer coach tips include creating a simple sign-up sheet for these roles:
- Station Manager: Runs a specific drill circuit, ensuring athletes rotate properly and understand the exercise.
- Hydration & Safety Monitor: Keeps water stations full and alerts the head coach to any signs of fatigue or minor injury.
- Equipment Coordinator: Handles setup, breakdown, and organization of cones, balls, and other gear.
- Timekeeper/Scrimmage Facilitator: Manages drill timers and helps organize small-sided games.
Take ten minutes before practice to train your volunteers for their duties. A quick demonstration or review of protocols ensures everyone is on the same page. This small investment boosts confidence and prevents mistakes.
Lastly, create a positive, team-oriented culture among adults. Publicly thank volunteers by name. Encourage them to cheer for all athletes, not just their own. When parents and coaches unite, it creates a supportive environment. Mastering these volunteer coach tips improves session flow and strengthens the community around your team.
Local Resources: Camps, Clinics, and Certified Trainers Directory
Coaching is more than just practice. It’s about building a network of experts. This gives your athletes access to special training. It helps meet their needs and boost their skills.
First, find good local sports clinics. Look for ones with experienced coaches and positive feedback. Visit to see a session and learn about their approach. Good clinics share their staff’s credentials and schedules online.
Summer camps and weekend clinics offer deep training. They’re great for athletes wanting to improve a skill. Look for camps led by former college players or top coaches. They bring new ideas and motivation.
For personal training, find certified trainers. Check for NASM, ACE, or NSCA certifications. Many focus on youth or adult sport-specific fitness. A good trainer creates safe, effective plans that fit with team practice.
Make a directory of your trusted resources. Use a spreadsheet for contacts, specialties, and costs. Share it with parents and volunteers. A strong network helps your whole community and leads to success.