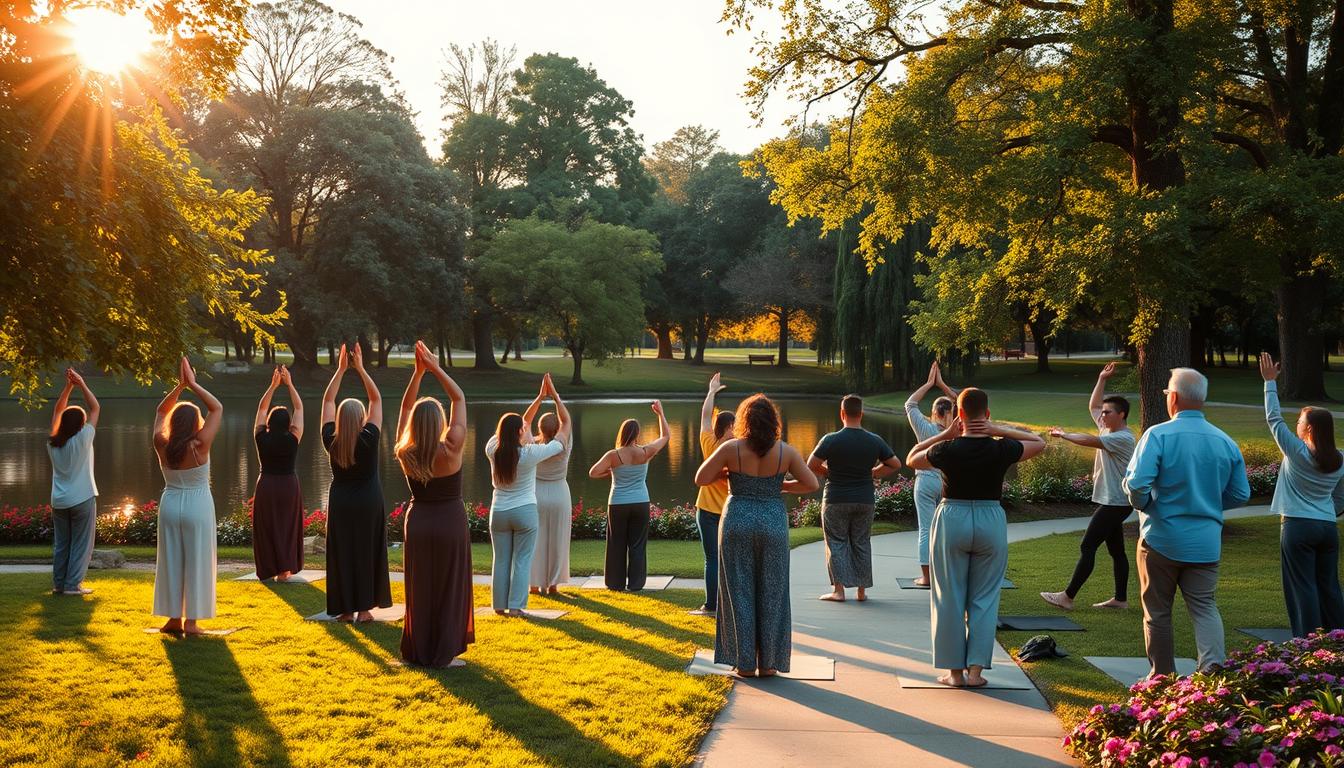
For years, the saying “no pain, no gain” has ruled training. But what if the key to better performance is actually strategic rest?
Ignoring your body’s need to heal can lead to plateaus, injuries, and burnout. Real progress comes when muscles rebuild, inflammation is controlled, and your nervous system gets a break.
This isn’t about being lazy. It’s about being smart. Modern science supports a more sustainable, holistic approach. It’s like adding peace and love to your routine—listening to your body and using proven methods to boost well-being.
This guide makes complex science easy to understand. It gives you the actionable knowledge to perform better and feel better. It turns recovery into your biggest advantage.
First 24 Hours After Practice or Game: A Simple Plan
What you do after a hard practice or game is key. It affects how quickly you recover and perform next time. A recovery timetable makes this process clear and effective.
Divide the first 24 hours into three phases. This helps your body repair itself better. It also helps you train consistently.
Phase 1: The Immediate Window (0-2 Hours Post-Exertion)
Your body starts repairing itself right after you stop. It needs nutrients and fluids fast. This is a critical time for recovery.
Focus on quick hydration and cool-down in this phase.
- Hydration: Drink 16-24 ounces of water or an electrolyte beverage. Replacing lost fluids is the first step to optimal function.
- Fuel: Consume a snack or shake with a 3:1 ratio of carbohydrates to protein within 30 minutes. This combo refuels energy stores (glycogen) and starts repairing muscle tissue.
- Initial Cool-Down: Perform 5-10 minutes of very light activity, like walking or easy cycling. This helps clear metabolic byproducts and gently lowers heart rate.
Phase 2: The Early Recovery Window (2-6 Hours Post-Exertion)
The repair machinery is now running. Your focus shifts from immediate response to sustained support. Inflammation management and continued nourishment are key here.
Your actions in this phase set the tone for the rest of the day.
- Meal Focus: Eat a balanced, whole-food meal with lean protein, complex carbs, and colorful vegetables. This provides the extended-release nutrients needed for ongoing repair.
- Light Movement: Avoid complete inactivity. Gentle stretching or a short, slow walk can improve circulation without adding stress.
- Compression: Consider wearing compression garments if you experience significant leg fatigue. They may help reduce swelling and muscle soreness during this period.
Phase 3: The Late Recovery Window (6-24 Hours Post-Exertion)
This is when deep restoration and adaptation occur. Your body consolidates the repairs initiated earlier. The priority is creating an environment conducive to this work, mainly through rest and strategic nutrition.
Sticking to the plan in this final phase solidifies your gains.
- Sleep Priority: This is the most powerful recovery tool. Aim for 7-9 hours of quality sleep. Growth hormone release during deep sleep is essential for tissue repair.
- Continued Nutrition: Maintain steady hydration and eat regular, nutrient-dense meals. Don’t skip breakfast the next morning; it replenishes liver glycogen and provides energy for the day.
- Active Recovery: If you feel up to it, a very light, non-impact activity like swimming or casual biking the next day can enhance blood flow and reduce stiffness.
Following this hour-by-hour recovery timetable makes recovery simple. It ensures you support your body at the right time. This turns fatigue into readiness and soreness into strength.
Sleep Toolkit for Athletes and Families
The secret to bouncing back faster from a tough game isn’t found in a bottle. It’s in mastering the science of sleep cycles. True sleep optimization is the ultimate, underrated recovery tool. It goes far beyond just getting more hours in bed.
This toolkit provides actionable steps to transform sleep from an afterthought into a non-negotiable pillar of athletic success.
Crafting the Ideal Sleep Environment
Your bedroom should be a recovery sanctuary. Three key factors dramatically improve sleep quality:
- Cool: Aim for a temperature between 60-67°F. A cooler room helps lower your core body temperature, signaling your brain that it’s time for sleep.
- Dark: Use blackout curtains or a sleep mask. Even small amounts of light can disrupt the production of melatonin, your sleep hormone.
- Quiet: Use a white noise machine or a fan to mask disruptive sounds. Consistency in your sleep setting trains your brain to wind down.
Your body needs a signal to shift from active mode to rest mode. A consistent 30-60 minute routine is that signal.
Start with a digital curfew. Put phones, tablets, and laptops away at least one hour before bed. The blue light from screens suppresses melatonin. Replace screen time with calming activities.
Effective relaxation techniques include light stretching, reading a physical book, or practicing deep breathing exercises. This process is key for athletes whose minds are racing from the day’s competition.
Understanding Sleep Cycles for Recovery
Sleep isn’t a uniform state. It cycles through stages, each with a specific recovery job.
Deep Sleep (Slow-Wave Sleep): This is the physical repair phase. During deep sleep, your body releases growth hormone, which is essential for muscle repair and tissue growth. This is when the damage from a hard workout is actually fixed.
REM Sleep: This stage is for cognitive and emotional recovery. REM sleep helps consolidate motor skills and memory. It’s when your brain practices and solidifies the plays and techniques you learned that day, making your performance sharper.
Making It Work for Busy Schedules
For families and athletes with 5 AM practices, consistency is more important than perfection. Go to bed and wake up at the same time, even on weekends. This regulates your internal clock.
If early mornings are mandatory, adjust bedtime earlier in small increments. Protect your sleep window as you would a training session. Nap strategically if needed—a 20-30 minute power nap can boost alertness without causing nighttime sleep disruption.
Viewing sleep as a core part of training is the mindset shift that leads to real results. Prioritizing sleep optimization ensures you repair, recharge, and return to the field stronger.
Hydration and Post-Game Nutrition Quick Wins
Let’s focus on quick ways to refuel your body. The right steps after exercise can turn fatigue into fuel for your next session.
Hydration is key. Even a little dehydration can slow you down and hurt your recovery. A simple way to check is by weighing yourself before and after your game or practice.
For every pound lost, drink 16-24 ounces of fluid. This helps replace what you sweated out. Water is good, but for longer sessions, you need electrolytes too.
Electrolytes like sodium and potassium help your body hold onto fluid and support nerve function. You don’t need fancy sports drinks. Try these real-food options:
- A pinch of salt in your water with a slice of lemon.
- Coconut water (look for low-sugar varieties).
- Bananas or a handful of salted nuts post-game.
Next, tackle nutrition. Your muscles are ready to absorb nutrients within 30-60 minutes after stopping. Aim for a meal or snack with a 3:1 ratio of carbohydrates to protein. Carbs restock energy stores. Protein repairs muscle tissue.
This doesn’t require a lab or special powder. Think whole foods that are easy to grab or prep. Here are balanced options for different situations:
| Situation | Carbohydrate Source | Protein Source | Example Meal |
|---|---|---|---|
| Immediate Snack (On-the-go) | Fruit, Rice Cakes | Greek Yogurt, String Cheese | Apple with a single-serve Greek yogurt. |
| Post-Game Meal (At Home) | Sweet Potato, Brown Rice | Grilled Chicken, Salmon | Grilled chicken breast with a large sweet potato and steamed broccoli. |
| Vegetarian Option | Quinoa, Whole Wheat Pasta | Lentils, Tofu, Eggs | A scramble with 2-3 eggs, spinach, and a side of quinoa. |
Now, let’s add a powerful tool: compression. Wearing compression garments like sleeves, socks, or tights after activity supports your recovery system.
How does it work? Gentle, graduated compression improves blood circulation. This helps shuttle waste products like lactic acid away from tired muscles. It also brings fresh, oxygen-rich blood to the area.
The result is reduced swelling and less perceived soreness the next day. Think of it as giving your circulatory system a helpful nudge. It’s a perfect partner to your fueling strategies for tournaments.
Put these quick wins together. Rehydrate based on your weight check. Eat a balanced meal with the right carb-protein mix. Consider slipping on some compression wear. This trio works synergistically to speed up your bounce-back, so you’re ready for whatever’s next.
Mobility Flow: 10-Minute Reset for Tight Hips and Backs
You don’t need a long yoga class to feel better after activity. A quick 10-minute mobility flow can make a big difference. It’s great for athletes and weekend warriors who often hurt their hips and lower back.
This simple routine helps improve flexibility and reduce soreness. It makes moving again feel comfortable.
First, know when to do it. Dynamic stretching is for warming up, like leg swings before running. Static or developmental stretching is for cooling down, when you hold a stretch to increase range of motion. This flow is perfect after your game or practice.

Here’s your 10-minute reset sequence. You just need a mat and a foam roller.
- Foam Roll Major Muscle Groups (3 minutes): This is myofascial release. It smooths out muscle tightness. Roll slowly over each area for 30-45 seconds.
- Glutes and Hamstrings: Sit on the roller, hands behind you. Roll from the back of your pelvis to mid-thigh.
- Upper Back (Thoracic Spine): Lie with the roller across your shoulder blades. Keep your hips up and gently roll a few inches up and down.
- Hip Flexors: Lie face down with the roller just below your hip bone. Apply gentle pressure.
- Developmental Stretching (7 minutes): Hold each stretch for 45-60 seconds. Breathe deeply.
- Kneeling Hip Flexor Stretch: Kneel on one knee, other foot forward. Tuck your tailbone and gently push hips forward until you feel a stretch in the front of the kneeling hip.
- Figure-Four Stretch (for glutes): Lie on your back. Cross one ankle over the opposite knee. Pull the uncrossed leg toward your chest.
- Seated Hamstring Stretch: Sit with one leg extended. Hinge at your hips to lean forward, keeping your back straight.
- Thoracic Extension: Sit on your heels. Place your hands on the floor in front, walk them forward, and drop your chest toward the floor. Let your upper back round gently.
Doing this flow daily keeps stiffness away. It turns recovery into a quick, effective habit. Your hips and back will thank you.
Ice, Heat, Compression, and Elevation: What the Science Says
Recovery isn’t just about tools; it’s about knowing when to use cold therapy or heat therapy. This guide helps you understand the science behind it. It offers clear, evidence-based methods for recovery.
First, you need to know the difference between acute injuries and muscle soreness. The R.I.C.E. method (Rest, Ice, Compression, Elevation) is for specific reasons.
R.I.C.E. is best for the first 24-72 hours after an injury. It helps control swelling and inflammation. Ice and compression are key here.
But, for muscle soreness after exercise, the rules change. Your body needs blood flow to heal, not just reduce inflammation. This is where the science gets interesting.
Cold Therapy: The Physiology of Ice
Cold causes your blood vessels to narrow. This reduces blood flow and slows down your body’s activity.
The main effect is less inflammation and swelling. It also numbs nerves, giving you pain relief. But, research shows using intense cold therapy only in acute phases or specific conditions.
For general soreness, too much icing can slow healing. It can block nutrients and immune cells from reaching damaged areas.
Heat works differently. It makes your blood vessels wider, increasing blood flow to muscles and tissues.
This increased blood flow brings more oxygen and nutrients. It also helps remove waste like lactic acid. Heat therapy is great for relaxing tight muscles and easing stiffness.
Use heat for chronic stiffness or to warm up tight areas before light activity. Avoid it for fresh injuries with swelling.
Choosing the Right Tool: A Practical Guide
Here’s a simple guide to use these therapies effectively.
- Use Cold Therapy (Ice): For acute injuries (first 48-72 hours), sharp pain, or after surgery. Apply for 15-20 minutes, with a cloth to protect your skin.
- Use Heat Therapy: For muscle tightness, chronic aches, or to warm up before gentle movement. Use for 15-20 minutes with a moist heat source.
- Use Compression: Mainly for acute swelling. It provides pressure to limit fluid buildup. Dynamic compression garments can help with soreness.
- Use Elevation: Best for acute limb injuries. Raising the injured area above the heart reduces swelling.
Don’t use ice for everyday soreness. For weekend warriors, a warm bath or shower might be better than an ice bath after a game.
Be informed and choose the right therapy at the right time. This will truly enhance your recovery.
Active Recovery Sessions: Swim, Bike, and Walk Options
Many athletes think active recovery is just a light workout. But it’s more than that. It’s a special practice for your rest days, with low-intensity, non-stressful movements.
This type of activity boosts blood flow. It helps remove waste from muscles without causing more damage. It’s about moving to recover, not to train hard.
Good active recovery has two main rules. Keep your heart rate low and focus on enjoying the activity, not performing well. Here are three great options for you.
The Gentle Swim
A swim session is perfect for full-body recovery. The water supports and resists your movements.
Work on smooth strokes and breathing. Avoid sprinting or hard intervals. Swim for 20-30 minutes.
Keep your heart rate in Zone 1 (50-60% of your max). This gentle effort improves circulation and joint mobility. It helps ease stiffness.
The Easy Bike Ride
Cycling on a flat, smooth path is a classic active recovery method. The key is to ride at a “conversational” pace.
You should be able to talk comfortably during the ride. Ride for 30-45 minutes on a stationary bike or a safe, flat route.
Watch your intensity. Your heart rate should be well below your aerobic threshold. This steady motion boosts leg circulation without strain.
The Brisk Nature Walk
Never underestimate the power of walking. A brisk walk in a park or on a trail is very restorative.
It works different muscles than running. Aim for a 30-60 minute walk at a pace where you can talk.
The light cardio, fresh air, and nature reduce stress hormones. This helps both physical and mental recovery.
| Activity | Recommended Duration | Target Intensity | Primary Recovery Benefit |
|---|---|---|---|
| Gentle Swim | 20-30 minutes | Heart Rate Zone 1 (50-60% max) | Enhances full-body circulation & joint mobility |
| Easy Bike Ride | 30-45 minutes | Conversational pace, low impact | Boosts leg circulation without muscular strain |
| Brisk Nature Walk | 30-60 minutes | Comfortable, talkable pace | Reduces systemic stress & promotes mental reset |
Adding these sessions helps your body recover better. True active recovery is not about adding more stress. It’s a smart way to get ready for your next practice or game.
Tournament Weekends: Stacking Games Without Burning Out
Success in a weekend of matches comes down to listening to your body and feeding it right. This peace and love mindset is key to avoiding a crash on the second day.
Managing your energy over a tournament is like running a long race, not a series of short sprints. You need a plan for the whole weekend, not just the time between games. Think of your body’s fuel tanks—glycogen, fluids, mental focus—and aim to keep them full.
Inter-game nutrition and hydration are non-negotiable quick wins. Eat a mix of carbs and protein within 30 minutes of a game ending. A banana with a protein shake or a turkey sandwich is great. Drink an electrolyte drink all day, not just when you’re thirsty. This keeps your energy up for the next game.
Your mini-recovery sessions between matches are where the peace and love philosophy comes to life. Don’t sit stiffly on the bench. Instead, do 5-10 minutes of light activity and mobility.
- Light Walking: A casual 5-minute walk promotes blood flow to clear metabolic waste.
- Dynamic Mobility: Gentle leg swings, torso twists, and arm circles keep muscles supple.
- Foam Rolling (if available): Focus on major muscle groups like quads and calves for just a few minutes.
Mental resets are just as important. The competitive intensity can leave you stressed. Take 2-3 minutes to sit quietly, practice box breathing (inhale 4, hold 4, exhale 4), or simply change your environment. This mental cooldown helps you stay calm.
It’s also key to prioritize recovery over social plans. While it’s tempting to celebrate or analyze with teammates, your body needs rest and proper fuel more. This choice shows you value your long-term performance over short-term fun.
Here’s a sample game-day schedule that puts these principles into practice:
| Time Block | Action | Recovery Goal |
|---|---|---|
| Post-Game (0-30 min) | Hydrate, consume carb+protein snack, change into dry clothes. | Replenish core nutrients, start muscle repair. |
| Between Games (60-90 min) | Light walk, dynamic mobility, mental breathing exercise. | Promote circulation, reduce stiffness, lower stress. |
| Evening After Day 1 | Full meal, hydration, compression gear, early bedtime. | Deep recovery and preparation for Day 2. |
By stacking these small, intentional habits, you build resilience. You move from surviving a tournament to competing at your best throughout. Remember, true strength in a multi-game weekend comes from balancing effort with the peace and love of attentive recovery.
Low-Cost Tools That Work (Bands, Rollers, Lacrosse Ball)
Forget expensive gadgets. Self-care and improving tissue quality are about a few affordable tools. You don’t need a big budget for a good recovery routine. With basic knowledge, simple tools can give you a strong self-massage and muscle release.
These three items make a complete, low-cost toolkit. They make recovery accessible to everyone, not just athletes.
Resistance Bands
These elastic bands are great for more than just strength training. They’re good for muscle activation and strengthening often-overlooked areas. They also improve blood flow to muscles before or after exercise.
Key Exercise: Banded Glute Bridge. Use a medium-resistance band above your knees. Lie on your back with knees bent. Press your hips up while pushing knees outward against the band’s tension. This works the glutes and gives a light massage effect before working out.
Safety Tip: Always check bands for nicks or tears before use. Never stretch a band more than 2.5 times its resting length to avoid it snapping.
Foam Rollers
A foam roller is perfect for myofascial massage of big muscle groups. It helps loosen up stiffness in the quads, hamstrings, and back. The pressure from your body weight eases tension and improves tissue glide.
Key Technique: Quad Roll. Lie face down with the roller under your thighs. Use your arms to slowly roll your body from just above the knees to the top of the hips. Pause for 20-30 seconds on any tender spot.
Safety Tip: Avoid rolling directly over joints or bony areas like the spine and knees. Keep movements slow and controlled.
Lacrosse Ball
This small, dense ball is a precision tool. It targets specific trigger points and adhesions that a roller can’t reach. It’s great for the feet, glutes, and shoulders.
Key Technique: Plantar Fascia Release. While seated, place the ball under the arch of your foot. Apply moderate pressure and roll it back and forth for one to two minutes. This gives a deep tissue massage for the foot.
Safety Tip: Do not use excessive force, specially on sensitive areas. Limit sessions to a few minutes per muscle group to prevent bruising.
Together, these tools create a powerful system. Use bands for activation, the roller for broad release, and the ball for pinpoint work. This approach improves tissue quality and accelerates recovery without a high financial barrier.
Start with just one tool and master its basic use. Consistency with these simple items is far more valuable than sporadic use of expensive equipment. Build your affordable massage toolkit and feel the difference in your next workout.
Monitoring Fatigue with RPE and HRV (No Fancy Tech Needed)
Your body sends clear signals about its recovery status. Learning to interpret these signals is a game-changer. You don’t need a lab full of equipment. Two powerful tools—one subjective, one objective—can give you the insight you need to train smarter.
The first tool is your own perception. The Rate of Perceived Exertion (RPE) scale is a simple, subjective metric for how hard a workout feels. It turns a gut feeling into a number you can track.
Logging your daily RPE helps you spot patterns. After a game or tough practice, jot down a number from 1 to 10. A 2 might be a gentle walk, while a 9 feels like an all-out sprint. Over time, you’ll see if your “easy” days are creeping up to a 6, which is a warning sign. For a deeper guide on using the RPE scale, more resources are available.
- Low (1-4): Very light to moderate activity. Good for active recovery days.
- Medium (5-7): Challenging but sustainable. Your typical practice intensity.
- High (8-10): Maximum effort. Reserved for games and peak performance.
For objective data, look to your nervous system. Heart Rate Variability (HRV) measures the tiny changes in time between your heartbeats. Higher HRV generally means your body is relaxed and recovered. Lower HRV suggests your system is stressed, possibly from training, lack of sleep, or illness.
The good news is that affordable hrv tracking is simple. Many free or low-cost smartphone apps use your phone’s camera to measure HRV. You can also use a basic chest strap or wrist-based wearable. The key is consistency: take a measurement first thing in the morning, before you get out of bed.
Interpreting the data is more about trends than a single number. Don’t panic if your HRV score dips one day. Look at your weekly average. A consistent downward trend, paired with high RPE scores, is a clear signal to pull back. It means your body needs more rest. This is how you use your hrv tracking data to adjust training intensity proactively.
Together, RPE and HRV create a complete picture. RPE tells you what you feel in the moment. HRV shows you what your autonomic nervous system is doing behind the scenes. Using both empowers you to move from guessing to knowing, building a truly responsive and informed approach to your training load.
Common Mistakes That Slow Recovery
Spotting and fixing common recovery mistakes is key for athletes and active people. A few simple errors can make a big difference in how quickly you recover. This knowledge can turn a slow recovery into a speedy one.
By knowing these mistakes, you can take charge of your recovery. You’ll go from hoping to recover to knowing you will.

Here are the most common mistakes that slow recovery, and how to fix them:
- Skipping the Cool-Down: Stopping suddenly is hard on your body. A 5-10 minute cool-down with light cardio and stretching helps. It tells your body the workout is over.
- Neglecting Hydration Post-Exercise: Thirst doesn’t always mean you need water. Even a little dehydration can slow down muscle repair. Drink 16-24 ounces of water in the first hour after working out.
- Poor Post-Game Nutrition Choices: Eating fast food or skipping meals misses a key time for refueling. Your muscles need carbs and protein to recover. A shake or a turkey sandwich is better than nothing.
- Over-Relying on Passive Recovery: Too much rest can make you stiff. Active recovery, like walking or swimming, is better. It helps bring nutrients to sore muscles and clears out inflammation.
- Misreading Your Body’s Signals (Soreness vs Pain): Knowing the difference is critical. Muscle soreness is a dull ache that gets better with movement. Pain is sharp and doesn’t get better. Confusing the two can lead to injury.
- Using Recovery Tools Incorrectly: Using foam rollers or ice too aggressively can be harmful. Rollers are for general muscle tension, and ice is for acute inflammation.
Understanding the soreness vs pain difference is key. Muscle soreness means your body is adapting. Sharp pain is a warning sign. Listening to this signal helps avoid injury.
Avoiding these mistakes doesn’t take more time, just awareness. Replace one bad habit with a good one each week. Your body will thank you for it.
When Soreness Becomes Injury
Post-exercise soreness is normal, but some signs are warning flags. Knowing the difference between muscle fatigue and injury is key. It helps you train smarter and recover better.
Normal soreness, or DOMS, feels like a general ache. It peaks 24-48 hours after exercise and gets better with gentle movement. Injury pain, on the other hand, is sharp and stabbing.
Here’s a table to spot red flags. If you see symptoms on the right, it’s time to stop and check.
| Symptom Type | Normal Soreness (DOMS) | Potential Injury |
|---|---|---|
| Pain Quality | Dull ache, general stiffness | Sharp, stabbing, or shooting pain |
| Pain Location | Diffuse, across muscle groups | Localized to one specific spot |
| Response to Rest | Gradually improves over 72 hours | Persists or worsens with 2-3 days of rest |
| Swelling & Bruising | None present | Visible swelling, redness, or bruising |
| Joint Function | Full range of motion, maybe stiff | Instability, locking, or giving way |
Overuse injuries are common in sports. They happen when you don’t rest enough. Catching them early can prevent bigger problems.
Common overuse injuries include:
- Patellar Tendonitis (Jumper’s Knee): Pain below the kneecap, common in basketball and volleyball.
- Plantar Fasciitis: Heel or arch pain, often worse with first steps in the morning.
- Shin Splints: Pain along the inner shin bone, frequent in runners.
- Rotator Cuff Tendinitis: Shoulder pain with overhead motions, seen in swimming and baseball.
If you think you’ve injured yourself, act fast. The first steps you take can affect your recovery.
Initial Response Protocol:
- Stop the aggravating activity. Continuing to train through sharp pain usually makes things worse.
- Apply the P.O.L.I.C.E. principle. Protect, Optimal Loading, Ice, Compression, Elevation. Gentle movement is often better than complete immobilization.
- Monitor for 48-72 hours. Does the pain change with rest? Does swelling develop?
- Track your symptoms. Note when pain occurs, what makes it better or worse, and any functional limitations.
When should you seek professional help? If pain is sharp and localized, doesn’t improve after three days of rest, or is accompanied by swelling or joint instability, consult a qualified expert. This is where a professional assessment becomes invaluable.
A visit to a qualified local recovery studio or sports medicine clinic provides clarity. These professionals can diagnose the issue and create a targeted rehab plan. They offer services like physiotherapy, sports massage, and guided corrective exercise.
Finding the right local recovery studio is the next step. Look for practitioners with experience treating athletes in your specific sport. They should explain your condition clearly and provide a progressive plan to return you to activity safely. The right professional partnership turns a setback into a learning opportunity for stronger future performance.
Local Recovery Services and How to Vet Them
Learning personal recovery techniques is key. Professional services can add a lot to your routine. Options like sports massage, physical therapy, and float tanks offer specific benefits.
Finding the right service is important. Not all are the same. A simple check can save you time and money.
Start by checking credentials. A licensed physical therapist or certified massage therapist has the right training. Look for those with experience in sports. They know what athletes need.
Next, ask about their approach. It should be based on science. Stay away from those who promise quick fixes. Look for a focus on education and long-term health.
Think about the cost and what you get. A single cryotherapy session might be expensive but not very effective. On the other hand, a series of massages could help more. Tools like Theragun or Hyperice rollers offer ongoing benefits at home.
Using professional help wisely can boost your recovery. You become a smart consumer, picking services that really help. This step turns knowledge into lasting performance.