
Getting a young athlete back on the field after a setback is filled with emotion. Parents and coaches feel a natural urgency. But rushing the process risks long-term health. A structured, evidence-based return to play protocol is the essential map for this journey.
Safety and future performance must come first. This guide introduces the four non-negotiable physical criteria every clearance decision is built upon: Pain, Swelling, Range of Motion, and Strength.
We define these in practical terms. For example, an acceptable pain scale level during activity is specific, not just “feeling fine.” True restoration of range of motion means matching the uninjured side. Strength must meet functional benchmarks, not just feel strong.
Understanding these pillars removes guesswork. It transforms anxiety into a clear, step-by-step path forward for a safe and successful comeback.
Getting Medical Clearance and Required Forms
The medical clearance process is more than just a formality. It’s a legal and health safety step. It lets an athlete safely return to training and competition.
A signed clearance form is not just a piece of paper. It’s a deal between a healthcare provider, the athlete, and the sports group. It shows the athlete is ready to start a return to play protocol.
Without this clearance, athletes risk getting hurt again or facing serious health issues. Schools and clubs need it to protect themselves. It also helps ensure athletes can safely get back into sports.
What does a full medical clearance include? It’s not just a simple “you’re good to go.” It involves:
- A full check-up of the injured area.
- Checking strength, flexibility, and balance.
- Looking at the athlete’s recovery history and current symptoms.
- Talking about any ongoing meds or treatments.
For athletes recovering from illnesses like viral infections that can harm the heart, a cardiac screening might be needed. Conditions like myocarditis need careful checks before allowing sports. This might include an EKG or a cardiologist’s advice.
Being ready for the medical visit helps athletes and parents. Here’s how to prepare:
- Bring all medical records, imaging reports, and your rehab plan.
- Write down questions for the provider.
- Wear the right clothes for a physical exam and tests.
Ask your doctor or physical therapist these questions:
- “What specific physical benchmarks did I meet to get cleared?”
- “Are there any movements or activities I should avoid?”
- “What signs or symptoms should cause me to stop and contact you immediately?”
Not all clearance forms are the same. Different groups have different needs. Knowing which form you need saves time and trouble.
| Form Type | Primary Purpose | Key Components Often Required | Important Notes |
|---|---|---|---|
| School District Form | To meet state athletic association and school policy for sports. | Provider signature, date of clearance, specific activity restrictions, emergency contact info. | Often has an expiration date (e.g., one year). Must be on the district’s official template. |
| Club Sport/League Form | To fulfill the private organization’s insurance and liability needs. | Similar to school forms, but may include waivers and assumption of risk language. | Can be more sport-specific. Always submit a copy and keep the original. |
| Physician’s Own Form/Note | To give a detailed medical opinion and specific guidelines for the return to play protocol. | Detailed diagnosis, treatment summary, specific limitations, and recommended progression phases. | This is the most detailed. It serves as excellent communication to coaches and athletic trainers. |
After getting the signed clearance form, keep several copies. Give one to the school athletic director, one to the coach, and keep one for yourself. This document is key for the return process.
This step is about teamwork. A good provider will explain their reasons and set clear expectations. This turns the clearance form into a roadmap for a safe and confident return to your sport.
Building a Day-by-Day RTP Progression
Think of your comeback as building a staircase, not a sprint. Each step is a foundation for the next. This is what a safe graded progression is all about.
A day-by-day plan is your roadmap. It slowly adds load and complexity to your body. This way, you avoid re-injury and build confidence. Your return to play protocol must be flexible, adapting to your body’s feedback every day.
Forget about racing. A successful comeback is like a flexible staircase. You must master each step before moving up. Here are the typical phases in a structured return to play protocol:
- Phase 1: Light Aerobic Activity. This means walking, cycling, or swimming at a low intensity. The goal is to increase heart rate and blood flow without stress on the injured area.
- Phase 2: Sport-Specific Movement Patterns. Introduce drills that mimic your sport’s movements. For a basketball player, this could be stationary ball-handling. A soccer player might practice light footwork patterns.
- Phase 3: Non-Contact Drills. Add speed, agility, and skill execution. This phase includes shooting drills, passing sequences, or sprinting mechanics—all without physical contact.
- Phase 4: Controlled Contact. Reintroduce light, planned contact in a practice setting. This is key for sports like football or hockey to rebuild confidence in collisions.
- Phase 5: Full Competition. The final step is a return to game-speed scrimmages and official competition. You should feel physically and mentally ready.
Let’s see how these phases play out in real life with sport-specific examples.
- Basketball (Ankle Sprain): Day 1-3: Pool walking. Day 4-6: Stationary dribbling. Day 7-9: Light shooting, no jumping. Day 10-12: Agility ladder drills. Day 13-15: Non-contact scrimmage.
- Soccer (Hamstring Strain): Day 1-3: Stationary bike. Day 4-6: Walking with ball touches. Day 7-9: Light passing drills. Day 10-12: Progressive sprinting at 50%, then 75% effort. Day 13-15: Small-sided, non-contact games.
- Football (Concussion Protocol): This follows a strict return to play protocol. It starts with complete rest, then light aerobic exercise, then sport-specific drills, non-contact practice, full-contact practice, and then clearance for game play.
The magic is in mastering each step. Don’t move to Phase 3 if Phase 2 hurts or tires you out. Your graded progression is a personal blueprint. It listens to your body’s signals every day.
Creating this day-by-day plan turns theory into practice. You move from general activity back to your specific sport. A thoughtful return to play protocol is your best tool for a safe and strong return.
Functional Testing and Benchmarks by Sport
The final check before returning to competition isn’t a doctor’s note. It’s a set of measurable, sport-specific physical benchmarks. This phase, known as functional testing, focuses on proving readiness for the game. It’s the key milestone that shows all the hard work in rehab has paid off.
So, what is functional testing? It’s standardized assessments that mimic the physical demands of your sport. They measure power, agility, stability, and endurance under controlled conditions. Common tests include:
- Single-Leg Hop Tests: Measures power, balance, and symmetry between limbs.
- Agility T-Test: Assesses quick changes of direction, acceleration, and deceleration.
- Endurance Shuttle Runs: Evaluates cardiovascular fitness and repeat effort capacity.
- Balance and Stability Assessments: Checks proprioception and control on unstable surfaces.
Passing these tests isn’t about feeling good. It’s about hitting clear, numerical benchmarks. For example, a cleared athlete might need to achieve 90% symmetry on single-leg hops compared to the uninjured side. Or complete an agility drill within a time standard set for their position. These numbers remove guesswork and provide undeniable proof of readiness.
Once an athlete passes general functional tests, the next layer is sport-specific drills. These exercises replicate the exact movements and intensities of competition. They bridge the gap between being “fit” and being “game-ready.”
Here are examples of critical sport-specific drills used for clearance:
Soccer/Football: Athletes must perform repeated cutting drills at full speed, simulating evading a defender. They’ll also complete passing and shooting drills under fatigue to test technical skill when tired.
Baseball/Softball: A throwing progression is essential, moving from short toss to long throws from the position’s required distance. Hitters will face live pitching or a pitching machine to test rotational power and timing.
Basketball/Volleyball: Focus lands on jumping and landing mechanics. Athletes perform repeated vertical jumps, box jumps, and practice landing softly and in control after simulating a rebound or spike.
This stage of functional testing provides the ultimate confidence boost. It shows the athlete, coach, and medical team that the body can not only handle stress but can perform the complex, explosive movements required to win. It’s the definitive step from the training room back to the team.
Monitoring Logs: Symptoms, Sleep, and Workload
Want to come back strong? Start by logging your symptoms, sleep, and workload every day. It’s not about magic exercises. It’s about listening to your body and tracking your recovery.
This habit turns vague feelings into clear data. It’s like having a personal alarm for injuries or burnout. It helps you catch problems early.
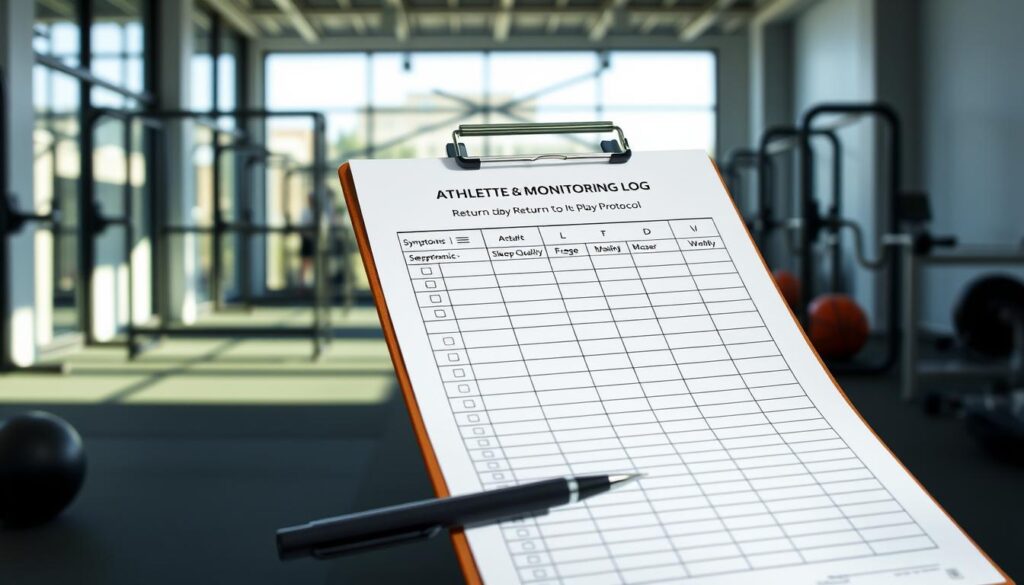
Think of it as a quick, three-question check-in each evening. Your log should track symptoms, sleep, and workload.
- Symptoms & Soreness: How does the injured area feel? What is your energy level?
- Sleep Quality: How many hours did you get? Was it restful or restless?
- Workload (The Numbers): What was the duration, intensity, and total volume of your activity today?
Now, let’s dive into how to use this system.
Interpreting Symptoms and the Pain Scale
Use a 0-10 pain scale for any discomfort. A “0” means no pain, and a “10” is the worst. Track the trend, not just the number.
Morning soreness that fades is okay. But pain that stays or gets worse is a warning sign. Always be honest with your team.
Why Sleep Quality is Non-Negotiable
Sleep is when your body heals and gets stronger. Logging sleep is more than just counting hours. Note if you feel refreshed or tired.
Poor sleep slows healing and raises injury risk. It affects reaction time and decision-making. Bad sleep patterns mean it’s time to rest more.
Calculating Safe Workload Progressions
Workload shows how much stress your body takes. “Duration” is how long you trained. “Intensity” is how hard (e.g., sprinting vs. jogging). “Volume” combines both.
A safe return to play protocol for youth sports follows a “load management” principle. Don’t increase weekly workload by more than 10-20% each week. Your log helps you avoid overdoing it.
Being consistent with this log is key. It turns your comeback into a data-driven journey. The athlete who logs faithfully knows their safe return path.
Mental Readiness and Confidence Checks
Physical tests show an athlete’s body is ready. But the mind tells the real story. A successful comeback requires both. This section focuses on the psychological side of recovery. It is a core part of a complete return to play protocol for youth sports.
An injury or illness does more than strain a muscle. It can shake an athlete’s confidence. Common feelings include fear of re-injury, hesitation during drills, or lost trust in their body. These mental hurdles are normal. Ignoring them can delay a true return to peak performance.
Mental readiness means feeling prepared, focused, and confident. It is not about being fearless. It is about managing doubt and building resilience. The following table outlines practical “confidence checks” to help athletes rebuild their mental game.
| Confidence Check | Description | Key Action for Athletes |
|---|---|---|
| Visualization | Mentally rehearsing successful plays and positive outcomes. | Spend 5 minutes daily picturing a perfect practice or game scenario. |
| Gradual Exposure | Slowly reintroducing game-like pressure and stimuli in a safe setting. | Start with non-contact drills, then add light defense, then full speed. |
| Positive Self-Talk | Replacing negative thoughts with constructive, encouraging statements. | Create a short mantra like “I am strong and prepared” to use during tough moments. |
Visualization is a powerful tool. Athletes should close their eyes and imagine themselves performing well. They should feel the movements and see the success. This practice builds neural pathways. It makes the actual performance feel more familiar and less daunting.
Gradual exposure is about taking small steps. An athlete recovering from a knee injury might first just watch team practice. Next, they participate in warm-ups. Later, they join specific, low-intensity drills. This step-by-step approach reduces anxiety. It proves to the athlete that their body can handle more.
Positive self-talk fights the inner critic. After an injury, thoughts like “I’m too slow now” or “I’ll get hurt again” are common. Athletes should learn to recognize these thoughts. Then, they should consciously replace them with facts. “I have done my rehab. My strength tests are good. I am ready for this step.”
Coaches and parents play a huge role in mental readiness. Their support must be positive and pressure-free. Avoid phrases like “You should be over it by now” or “Just tough it out.” These comments can increase anxiety.
Instead, use supportive language. Ask open-ended questions. “How are you feeling about that drill?” or “What part of practice seemed hardest today?” Listen without judgment. Celebrate small mental victories, like trying a new drill or using a positive mantra.
This supportive environment is integral to the return to play protocol. It tells the athlete that their mental state matters. It frames confidence-building as a normal, essential part of healing. Just like physical therapy, mental readiness takes consistent practice.
Ultimately, confidence checks ensure the athlete is truly ready to compete. They bridge the gap between physical clearance and full, fearless play. Do not rush this phase. A confident athlete is a safer and more effective athlete. Make mental readiness a non-negotiable step in your return to play protocol.
School, Club, and Family Communication Plan
Communication is key, not just physical training. Without clear coach-parent-pt communication, even the best plans can fail. This section will guide you.
Your communication plan is like a playbook for your support team. It outlines what to do and when. This keeps everyone on the same page and the athlete safe.
Who needs to be in the loop? The table below maps out the essential contacts.
| Key Person / Role | Essential Information to Share | Preferred Channel |
|---|---|---|
| Athletic Trainer (AT) or Physical Therapist (PT) | Full phased progression plan, specific exercise limitations, signs of pain or regression. | Shared digital document, weekly email summary, in-person check-ins. |
| School Nurse | Medication schedules, activity restrictions during school hours, emergency contact protocol. | Brief meeting at start of plan, follow-up email with key points. |
| Head Coach | Overall timeline for return, expected participation level in practice, clear “do not do” list. | Pre-season meeting, copied on major email updates to AT/PT. |
| Position Coach or Skills Coach | Daily or weekly drill modifications, technical adjustments to protect the injury. | Quick daily verbal check-ins, text group for immediate updates. |
| Parents / Guardians | All of the above, plus updates on fatigue, mood, and sleep at home. | Regular family meetings, access to the shared progression document. |
Use this table as a living guide. Update it as the plan changes. The goal is a unified support team.
What information is non-negotiable to share? First, the phased progression plan. Everyone should know the stages. Second, specific limitations. Can the athlete sprint? Jump? Twist? Be exact.
Third, share the signs of regression. What pain is a red flag? What fatigue level means “stop”? This empowers the team to act.
Choose your channels wisely. For formal updates, use email. It creates a record. For a living plan, use a shared document like Google Docs. Everyone sees the latest version.
For quick touchpoints, brief meetings or texts work. The key is consistency. Pick a method and stick to it.
This proactive approach aligns expectations. The coach knows the limits. The parents know the schedule. The athletic trainer gets feedback from all sides. It turns individual efforts into a coordinated strategy.
Investing time in this communication plan pays off. It reduces anxiety for the athlete. It builds confidence. Most importantly, it protects the recovery. Start the conversation today.
RTP for Common Issues: Ankle Sprain, Concussion, and Illness
Three common scenarios demand distinct approaches: ankle sprains, concussions, and post-illness recovery. A generic checklist fails here. Each condition has its own biological healing timeline and specific functional milestones.
For an ankle sprain, the primary focus shifts to ligament stability and proprioception. You cannot just wait for pain to disappear. The joint must relearn its position in space to prevent chronic instability.
Rehabilitation progresses from basic range-of-motion to balance challenges on uneven surfaces. Strength training targets the muscles that support the ankle. Functional tests, like hopping on one leg, become the final gatekeeper before full sport participation.
A concussion follows a mandatory, step-wise graduated protocol. Physical rest is just the beginning. Cognitive rest is equally critical—limiting screen time, schoolwork, and other mental exertion.
The return-to-play stages are non-negotiable. They start with light aerobic activity and progress through sport-specific drills. Any return of symptoms means dropping back a step. This protects the brain and allows for proper healing.
Returning after a significant illness, like mononucleosis or a heat illness, requires extended timelines and medical oversight. The body’s systems, specially the cardiovascular system, need time to recover fully.
A critical step for any illness with possible cardiac involvement is a cardiac screening. This is non-negotiable before returning to strenuous activity. It ensures the heart has not been affected.
The table below highlights the key differences in approach for these common conditions:
| Condition | Primary Healing Focus | Key RTP Benchmark | Critical Medical Step |
|---|---|---|---|
| Ankle Sprain | Ligament stability & Proprioception | Single-leg hop test without pain or instability | Physical therapist clearance for dynamic movement |
| Concussion | Neurological & Cognitive rest | Completing full graduated protocol symptom-free | Clearance by a healthcare provider trained in concussion management |
| Illness (e.g., Mono, Heat Illness) | Systemic recovery (Cardiac, Energy) | Normalized blood work & fatigue-free daily activity | Cardiac screening (EKG, possibly echocardiogram) before exertion |
For a heat illness return, the protocol is cautious. Acclimatization to heat and humidity must be gradual. Hydration and electrolyte balance are monitored closely.
This comparison makes one thing clear: a one-size-fits-all plan is ineffective and risky. Your specific diagnosis dictates your specific pathway back to the field.
Protective Bracing, Taping, and Equipment Adjustments
This section focuses on the gear that helps athletes recover. Braces, tape, and equipment tweaks are not magic solutions. They offer temporary support and build confidence as athletes follow a return to play protocol for youth sports.
It’s important to know the different types of support. A functional brace is used after big injuries, like an ACL tear. It limits harmful movement but lets safe motion happen. Prophylactic taping, like ankle tape, helps prevent injury in hurt joints. It gives feedback and some support.
These tools don’t replace healed tissue or strength. A sports medicine expert should guide their use. The aim is to stop using them as the athlete’s muscles and coordination get better.
How long to use a brace or tape varies. It depends on the injury, the sport, and the athlete’s rehab progress. Coaches and parents must follow the medical team’s advice on when and for how long to use these aids.
Equipment tweaks are also important. Small changes can reduce stress on healing areas. Common adjustments include:
- Cleat Length: Shorter cleats can lower the risk of turf catches and re-sprains for a healed foot or ankle.
- Added Padding: Extra padding in shoes, shin guards, or gloves can protect sensitive areas from impact.
- Helmet Fit: After a concussion, a snug, certified helmet is essential for safety.
These gear checks are simple but effective. They help manage the body’s load as activity increases.
Remember, bracing, taping, and equipment tweaks are part of a bigger plan. They support the recovery journey but are not the end goal. A successful youth sports return to play protocol uses these tools wisely. It always puts the athlete’s long-term health and full recovery first.
Preventing Re-Injury: Prehab and Load Management
Getting back to sports isn’t just about returning to the field. It’s about staying there without getting hurt again. This part focuses on building strength and resilience. A good return to play protocol goes beyond just getting cleared.
It builds a strong foundation for a long-lasting athletic career. This approach is key for athletes to stay healthy and perform well.
Prehab and load management are at the heart of this strategy. They are not just terms. They are essential for athletes to stay healthy and perform well.
Prehab: Your Proactive Shield
Prehab is preventive work done after an injury heals. It aims to prevent the same injury from happening again. It’s like strengthening the weak link in your chain.
This includes strengthening the injured area and the muscles around it. For example, after an ankle sprain, you need to work on your calf and hip muscles. This helps distribute the stress evenly during play.
Good prehab exercises are specific to your sport and get progressively harder. They should be a regular part of your routine.
- Eccentric Strengthening: Slow, controlled lengthening of muscles (like Nordic curls for hamstrings) to build robust tissue.
- Proprioception Drills: Balance and stability work (like single-leg stands on a foam pad) to retrain the nervous system.
- Mobility Circuits: Dynamic stretches targeting joints and muscles that support the primary injury site.
- Cross-Training: Low-impact activities that maintain fitness without overloading the vulnerable area.
Load Management: The Art of Smart Training
Load management is about planning your training wisely. It’s about applying stress in a way that makes you stronger. Not doing it right can lead to re-injury.
Start slow after an injury. You can’t go back to your old training right away. A good return to play protocol includes a gradual increase in training.
This is done through periodization. Training is divided into cycles with different focuses. There are weeks of high load and weeks of recovery. This keeps you strong all season long.
Watch these key metrics to monitor your load:
- Volume: Total distance run, weight lifted, or minutes played.
- Intensity: How hard the athlete is working (e.g., sprint speed, weight percentage).
- Frequency: How many sessions are performed each week.
Coaches and athletes should track these metrics. A sudden increase in any area is a warning sign. A good rule is to not increase your weekly training by more than 10%.
Integrating Prehab and Load Management
The best athletes mix prehab into their daily training. They also listen to their body about how much to train. This approach turns recovery into a lifelong habit.
For example, a basketball player coming back from a knee injury might do prehab exercises during warm-up. They increase their practice time slowly over weeks. This approach strengthens the weak spot and manages overall body stress.
Seeing your return to play protocol this way changes everything. It turns recovery into a smarter training approach. It prepares you to compete and last in your sport.
This mindset is what makes a quick return to sports a lasting career. It gives you control over your athletic future.
When to Pause or Regress the Plan
Sharp pain, new swelling, or unusual fatigue are your body’s signals to hit the brakes on your return. A smart return to play protocol for youth sports requires flexibility. It values the athlete’s long-term health over short-term progress.
Moving forward no matter what is a dangerous mindset. Knowing when to pause or take a step back is the hallmark of responsible coaching and parenting.
This section outlines the clear red flags. It provides a practical guide for making confident decisions. Your goal is to protect the young athlete’s future in the game.
Key Red Flags That Demand Action
Listen to the athlete’s body and their performance data. Certain signs are non-negotiable stops on the road to full activity.
- Return of Sharp or Stabbing Pain: Dull, achy soreness from new activity might be normal. A sudden, sharp pain in the injured area is not. This is a primary signal to stop immediately.
- Increased Swelling or Inflammation: Some mild swelling after a workout can occur. Noticeable new puffiness, redness, or warmth around the joint or muscle is a setback. It means the tissue is being overloaded.
- Persistent Fatigue or “Heavy” Legs: It’s normal to feel tired after ramping up training. If fatigue doesn’t lift after a good night’s sleep, or if the athlete feels unusually sluggish for days, it’s a sign of poor recovery. The plan may be advancing too fast.
- Drop in Performance Metrics: Use your monitoring logs. Is the athlete slower, less powerful, or unable to hit target heart rates during drills? A consistent decline in measurable performance is a objective red flag. It shows the body isn’t ready for the current load.

Seeing one of these signs is not a failure. It is a critical piece of feedback. It means the current phase of the plan needs adjustment. This is a normal and expected part of the healing journey.
Your Decision-Making Flowchart
Empower yourself with a clear action plan. The table below serves as a simple flowchart for parents and coaches. It turns worry into confident steps.
| Red Flag / Symptom | Immediate Action | Next Step in the Plan |
|---|---|---|
| Sharp pain during activity | Stop the activity immediately. Apply ice if acute. | Regress to the previous phase of the progression for 2-3 days. Re-test with lower intensity. |
| New, visible swelling | Use the RICE method (Rest, Ice, Compression, Elevation). | Pause all sport-specific training. Return to basic rehab exercises only until swelling resolves. |
| Fatigue affecting multiple sessions | Implement a mandatory 48-hour rest period. Focus on sleep and nutrition. | Reduce the volume (time/distance) of the next week’s training by 30-40%. Gradually build back up. |
| Consistent drop in speed or power | Note the metrics in your log. Have an open conversation with the athlete. | Revisit the functional testing benchmarks from earlier phases. Ensure those are solid before adding more complex drills. |
| Loss of confidence or fear of re-injury | Pause physical progression. Shift focus to mental readiness exercises. | Incorporate more controlled, low-risk drills to rebuild confidence before returning to competition. |
Using this guide removes the guesswork. It allows you to act swiftly in the athlete’s best interest. A pause today can prevent a major re-injury tomorrow.
This proactive approach is part of a larger strategy for athlete health. Just as adjusting a return to play protocol is vital, so is proactive planning. Early registration for sports physicals and helps identify issues before the season starts.
Remember, the ability to adapt a plan shows wisdom. It safeguards the athlete’s long-term prospects in youth sports and beyond. Your confident decision to pause or regress ensures they return stronger, safer, and more resilient.
Downloadable Checklists and Templates
This section offers practical help with downloadable resources. We’ve taught you about safe recovery. Now, we help you take action.
We aim to give you useful tools. These templates make complex protocols easy to follow. They turn complex steps into simple plans.
These resources make recovery easier and more effective. They give you a clear plan, saving time and avoiding mistakes. They are like having a personal recovery guide.
Below is a full set of tools. Each one is key to the return to play protocol.
| Resource Name | Key Features | Best Used For |
|---|---|---|
| Master RTP Protocol Checklist | Covers all phases from rest to full competition. Includes space for dates and signatures. Links to functional test benchmarks. | Athletes and parents tracking the entire recovery journey. Ensures no step is missed. |
| Sample Medical Clearance Form | Pre-formatted document for your doctor. Lists key physical and cognitive milestones. Provides a clear clearance form for school or club requirements. | Facilitating clear communication with healthcare providers. Obtaining official permission to progress. |
| Customizable Monitoring Log | Daily trackers for symptoms, sleep, and workload. Visual graphs to spot trends. Adjustable for any injury or illness. | Identifying subtle setbacks early. Providing concrete data for coaches and therapists. |
| Communication Plan Template | Defines roles for parents, coaches, and ATCs. Includes a contact list and meeting agenda. Scripts for difficult conversations. | Aligning your entire support team. Preventing mixed messages and confusion. |
These are not just documents. They are systems built on proven return to play protocol standards. Download them, customize the details for your situation, and start executing your plan with confidence.
The sample clearance form is very useful. It makes medical jargon easy to understand. This helps your doctor know what your sport needs.
With these tools, you can manage your recovery well. Your next step is to find local experts who can help you use them.
Local PT/ATC Contacts and Walk-In Options
Your plan is ready. Now, it’s time to get help. Finding a local physical therapy clinic or an Athletic Trainer Certified (ATC) is key for a safe comeback.
Finding the right specialist is important. Look for those with experience in youth sports medicine. The American Physical Therapy Association (APTA) or the National Athletic Trainers’ Association (NATA) have online directories to help you find certified experts nearby.
A good provider knows your sport’s needs. They’ll ask about your training and goals. This makes sure your rehab and strength program fits you perfectly. Your local physical therapy team becomes a long-term health partner.
Injuries can happen anytime. Know where to go for walk-in care. Many cities have orthopedic urgent care centers for quick help with sprains or fractures. Having this plan helps avoid delays in getting the right care.
This guide has moved from knowing to doing. Use these resources to build your support network. The right local physical therapy or ATC contact offers the expert guidance you need for a confident and lasting return to play.